
Why plywood needs a different approach from solid timber
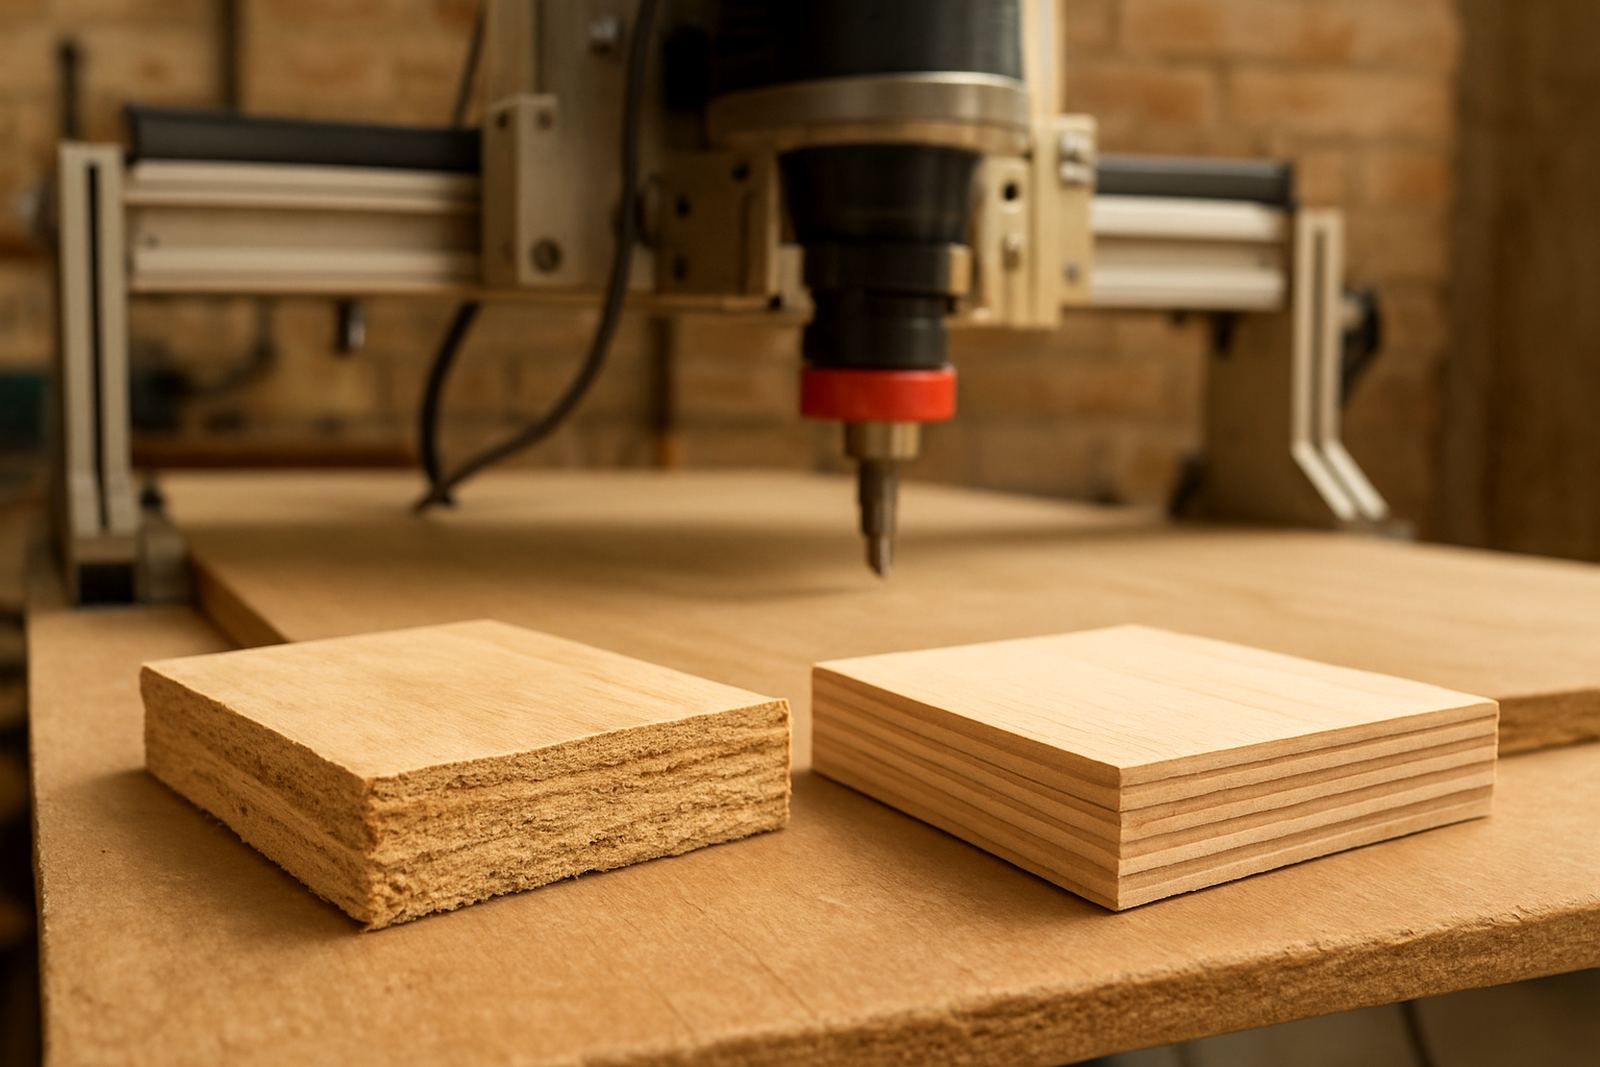
Plywood is made up of layers, and those layers do not always behave the same way across the full sheet. A clean cut on one section can start lifting the top veneer or chipping the bottom face a few metres later, especially if the sheet has thin outer plies or minor internal gaps.
That is why the best results come from treating plywood as a moving target. Rather than trusting one fixed feed speed for every job, match the cut to the sheet quality, the cutter diameter, and the type of finish you need. If you are running a small router in Silverton or a home workshop in Centurion, the same sheet can behave differently on a humid morning than it does on a dry afternoon.
The aim is simple: keep the cutter engaged enough to slice cleanly, but not so aggressively that it pulls fibres out of the face veneer. A slower pass is not always safer, because rubbing can heat the edge and make tear-out worse.
Set the feed so the cutter slices, not scrubs
Feed rate should work with spindle speed and cutter size. If the router is moving too slowly, the cutter spends too long on the same point and the veneer starts to fray. If the feed is too fast, the bit can chatter or leave ridges that need sanding. The sweet spot depends on your setup, but the signs are easy to spot once you know them.
- Clean shavings usually mean the cut is balanced.
- Fine dust often means the cutter is rubbing.
- Long torn fibres point to a feed that is too slow or a blunt tool.
- Edge burn can mean speed is low or the cutter needs replacement.
For smaller hobby routers, it helps to start with a test strip from the same sheet. Make one short cut, inspect the top and bottom faces, then adjust in small steps. That saves a lot of waste on full-size cabinet parts. On job work, a 2 mm change in depth per pass can make the difference between a usable edge and a panel that needs extra trimming.
Choose cut direction with the veneer in mind
Cut direction affects how the fibres break at the edge. On plywood, climb cutting can sometimes improve finish on the top veneer, but it must be used carefully because the tool wants to pull into the work. Conventional cutting is safer for roughing and for sheets that are already a bit soft around the edges.
A practical method is to rough the profile first, then take a lighter finishing pass with a small allowance left on the first pass. This reduces breakout on the final edge and gives the cutter a cleaner path. If the part has visible faces on both sides, clamp the sheet well and leave a sacrificial board underneath. That helps support the bottom veneer and limits blowout.
In Pretoria workshops, where many jobs involve cabinet doors, jigs, and display parts, one clean finishing pass often matters more than shaving a minute off cycle time. Small adjustments add up when you are cutting a batch of twenty panels.
Support the sheet properly before you start the cut
Feeding plywood well is not only about machine settings. The sheet must sit flat, supported evenly, and held down so it cannot shift when the cutter changes direction. A sheet that lifts even slightly can turn a good feed rate into a rough edge.
- Use a flat spoilboard and check it for wear.
- Support the full sheet, not only the corners.
- Clamp or hold down areas near the cut path where possible.
- Keep offcuts clear so they do not get dragged back into the cutter.
Humidity matters too. In coastal areas the board can swell, while inland dryness can make some sheets feel harder and more brittle. That changes how the veneer breaks at the edge. A fresh sheet brought in from a cold delivery truck may also move slightly as it warms up, so let it settle before precision work if you can.
Watch the cutter, because a blunt bit ruins good settings
Even the best feed settings will not rescue a worn cutter. Once the edge has dulled, the router starts pushing fibres instead of severing them. That is when you see fuzzy edges, lifted veneer, and extra sanding that eats into profit.
Check the cutting edge often, especially when working with glued sheets or mixed batches. Plywood glue lines are harder on tooling than many people expect. If you are hearing a change in sound, or the machine needs more effort to maintain the same finish, it is time to inspect the cutter. Keep spares on hand so a small batch does not stop halfway through.
For workshops around Midrand, Kempton Park, and Pretoria East, a simple spare plan can prevent lost hours. One replacement cutter and a basic maintenance routine often cost less than reworking damaged panels.
Build a repeatable method for your workshop
The safest way to improve plywood cuts is to keep notes. Record the sheet type, cutter size, spindle speed, feed, depth per pass, and the result. After a few jobs you will know which settings suit your own material stock and which suppliers send inconsistent board.
If the panel quality changes from one delivery to the next, do not assume the same feed will work every time. Adjust in small steps and keep a reference part on the shelf for comparison. A repeatable method is especially useful for operators who are still learning software basics or setting up a first machine at home.
For local support, training, starter setup visits, breakdown support, control tuning, and spares planning are all part of keeping the router productive. A short visit can save a week of trial and error, and in a small shop that matters more than people think.
Feeding plywood better is really about control. Once the sheet is supported, the cutter is sharp, and the settings are recorded, the machine can do cleaner work with less waste, and that is good for any workshop, whether you are in Silverton or working nationwide.